Automate Data Upload to Algolia Index
This post summarizes how to automate the manual upload of index records to Algolia if you use Netlify to host your website. With this enhancement, every time you add new or update existing content, it will be automatically indexed and uploaded to Algolia. This article is the fourth part of the series “Building Your Blog, the Geeky Way”.
Please read this post if you want to use JavaScript/npm-based implementation.
The Bilberry theme, which I used to create my website, comes with built-in search functionality. It’s implemented using the Algolia search engine. To activate this feature, what you need is to get a free-tier plan at algolia.com, populate corresponding Algolia params in Hugo configuration files and upload to Algolia generated index records, namely the content of the public/index.json file. You can upload them either manually or using Algolia’s API.
I use Netlify to host my website, and all websites on Netlify by default are built using a Docker image based on Ubuntu 16.04 LTS. Netlify’s Ubuntu image comes with both Python 2 and 3 preinstalled. Therefore, it would be logical to use Algolia API’s Python client to implement a script that reads the public/index.json file and uploads index records to Algolia. Then this Python script can be wrapped in a shell script that is executed right after the hugo command during the build. The default build command defined in the section Build settings of site’s Build & deploy configuration on Netlify should be overridden to call this shell script.
The proper way to do that is to use the netlify.toml configuration file where the build command and environment variables can be defined per the deployment context, for instance, prod and dev. Also, environment variables that are common for all deployment contexts, including sensitive configuration (e.g., the Algolia admin API key), can be defined at the site level in the section Environment variables. Since each deployment context is mapped to its proper Algolia index, the algolia_indexName parameter in the config/<environment>/params.toml file should be set with the corresponding index name.
Let’s take a closer look at how this solution is implemented: The source code is available here.
Algolia Indices
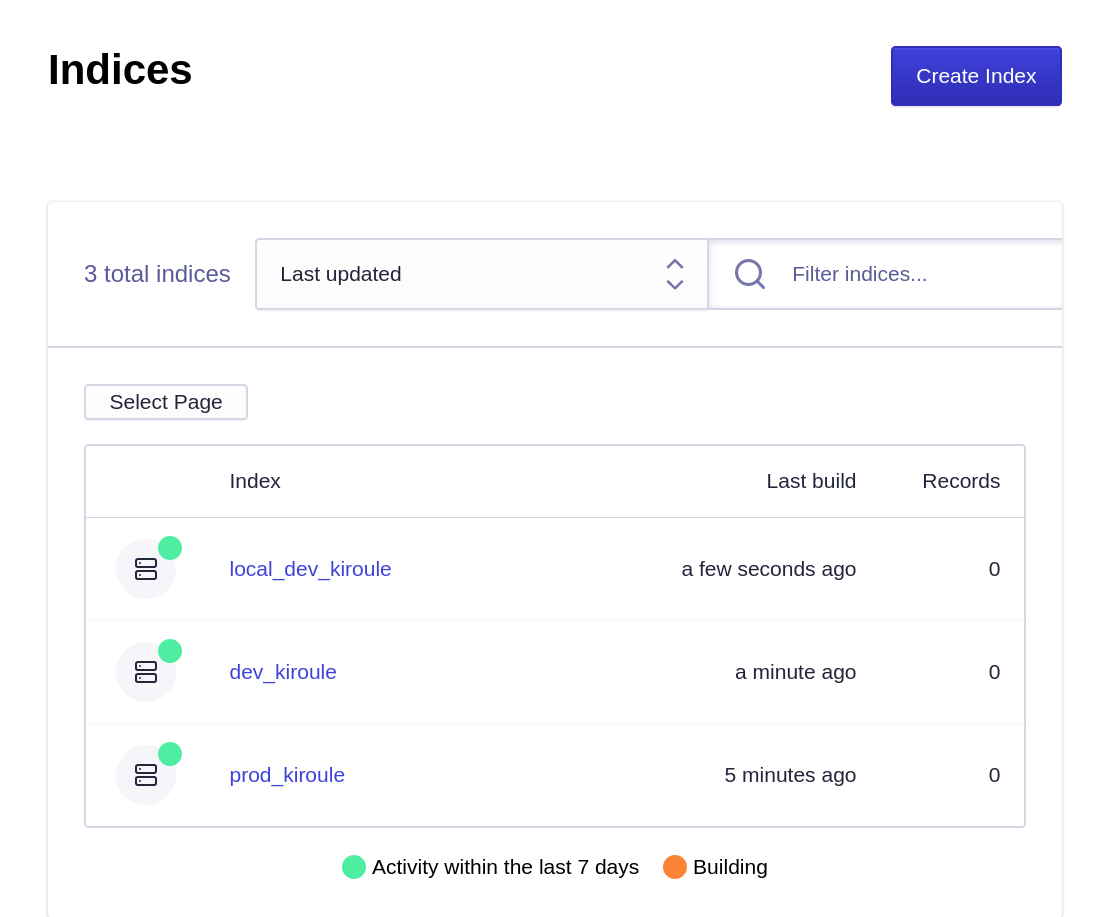
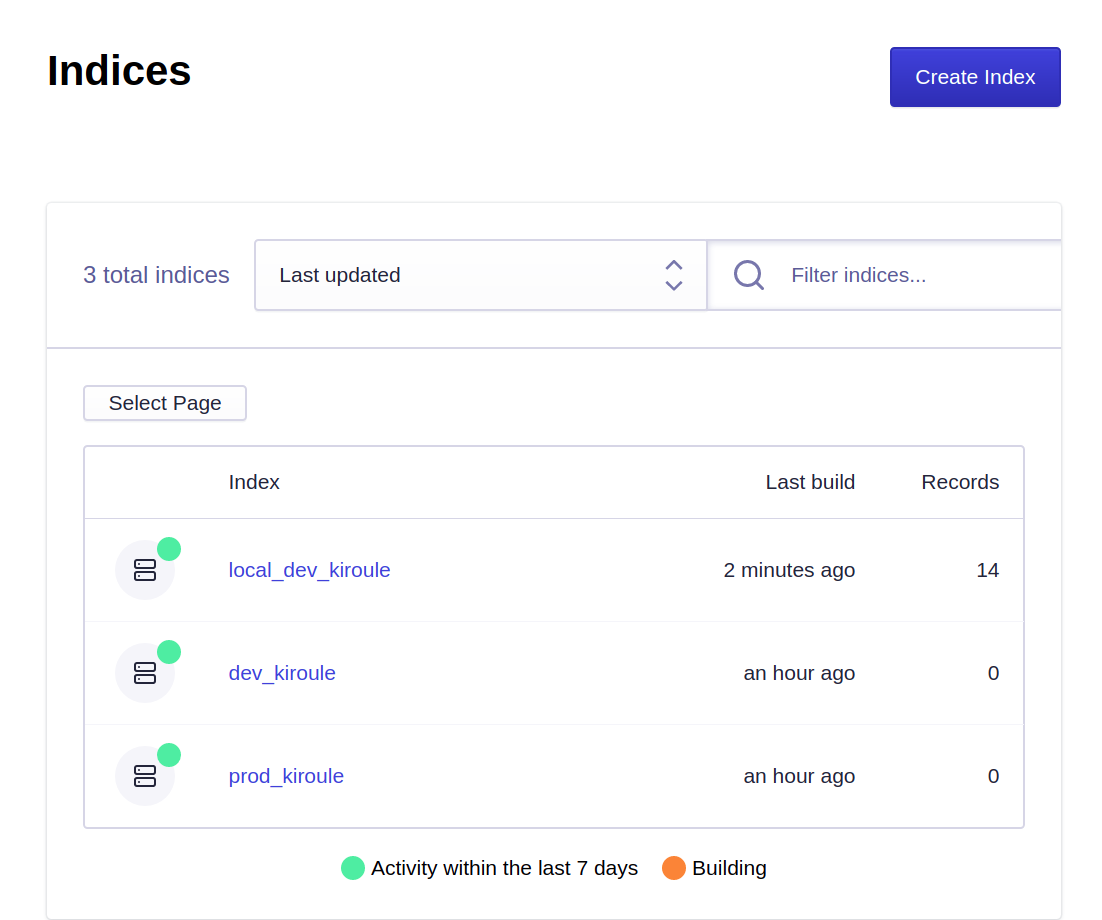
The very first step is to create and configure Algolia indices at algolia.com, one for each Git branch plus one additional index for the local environment. The master branch is mapped to the production environment, namely kiroule.com. All development is done in the dev branch, which deployed and tested at dev–kiroule.netlify.app before merging it into the master. Therefore, the following indices are needed: prod_kiroule, dev_kiroule and local_dev_kiroule.
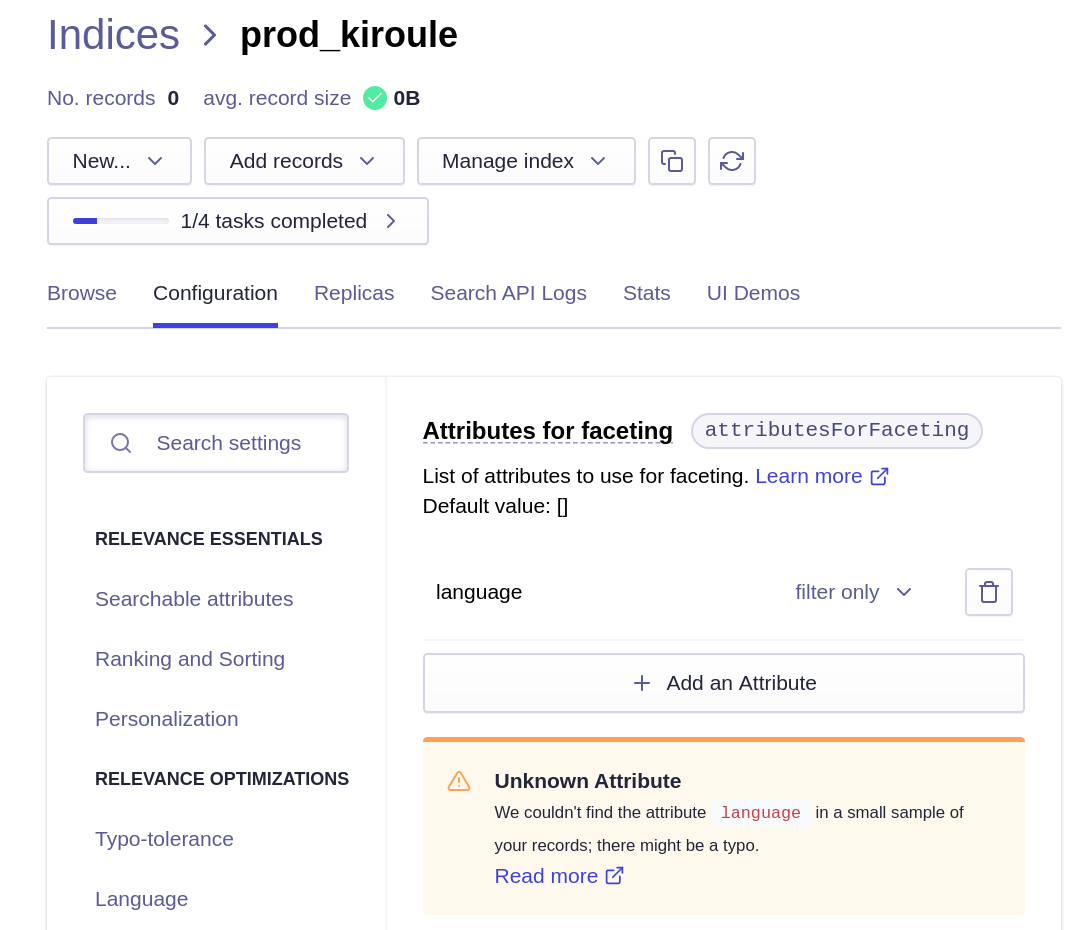
Each newly created index should be configured as follows: in the tab Configuration, select the Facets in the section FILTERING AND FACETING and add the language attribute with the filter only modifier in the Attributes for faceting option. The Unknown Attribute error can be ignored because the index has no records.
data-upload.py
The data-upload.py script reads the public/index.json file and uploads index records to Algolia. By default, index records from the public/index.json file will contain the url field with the value that starts with the base URL from the config/_default/config.toml configuration file:

If the --base-url option is provided, the base URL in the url field will be replaced with the new value, for instance, http://localhost:1313.
Before testing it in the local environment, install Algolia API’s Python client using the pip utility:
$ pip install --upgrade 'algoliasearch>=2.0,<3.0'
The script is implemented as follows:
import argparse
import json
from algoliasearch.search_client import SearchClient

parser = argparse.ArgumentParser()
parser.add_argument('-f', '--index-file', help="Index file to upload to Algolia")
parser.add_argument('-a', '--app-id', help="Algolia application ID")
parser.add_argument('-k', '--admin-api-key', help="Algolia admin API key")
parser.add_argument('-n', '--index-name', help="Algolia index name")
parser.add_argument('-u', '--base-url', help="Site base URL")
args = parser.parse_args()

with open(args.index_file, 'r') as file:
    indices_json = file.read().replace('\n', '')

indices = json.loads(indices_json)
if args.base_url:
    for index in indices:
        tokens = index["url"].split("/")[3:]
        index["url"] = args.base_url + "/" + "/".join(tokens)

client = SearchClient.create(args.app_id, args.admin_api_key)
index = client.init_index(args.index_name)
index.save_objects(indices)
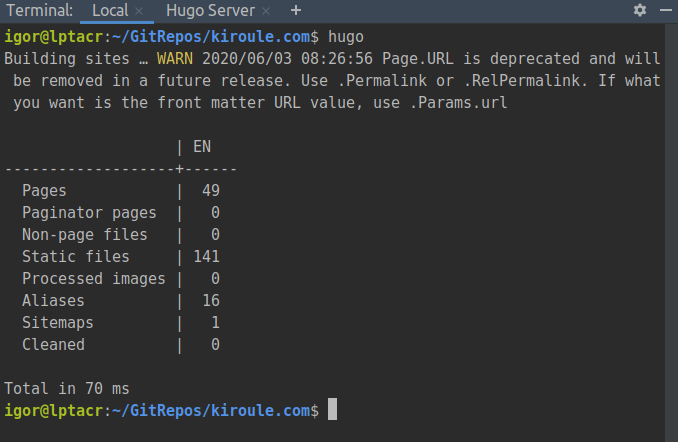
To generate the public/index.json file containing index records, execute the hugo command in the site’s root directory:
To do testing in the local environment, run the script from in command line from the site root as follows:
$ algolia/data-upload.py -f public/index.json \
    -a <algolia-app-id> \
    -k <algolia-admin-api-key> \
    -n <algolia-index-name> \
    -u http://localhost:1313
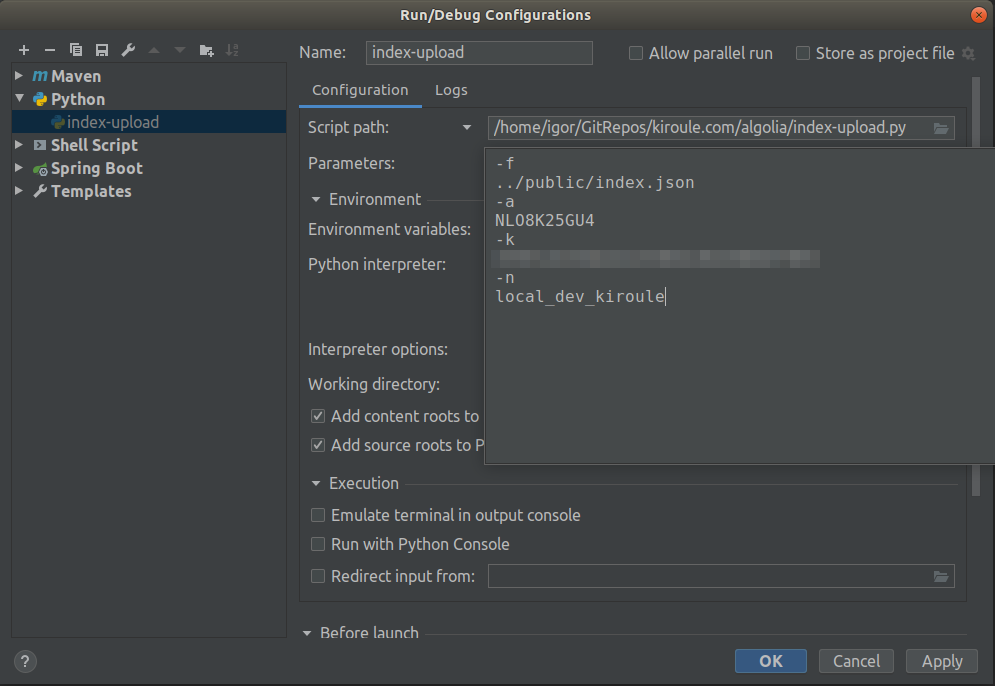
Or create a Run/Debug configuration in IntelliJ IDEA, for instance:
In the case of the script’s successful execution, the index entries will be uploaded into the corresponding index on Algolia. That can be verified in the application’s section Indices on Algolia by comparing the number of records, or the last build time before and after the script execution:
run-data-upload.sh
The run-data-upload.sh script is a wrapper shell script for the data-upload.py script. It can be executed either in the netlify or local mode. When it runs with the -p flag, i.e., in the netlify mode, Algolia API’s Python client is installed, and data-upload.py script’s arguments are initialized with the corresponding environment variables.
The script is implemented as follows:
#!/usr/bin/env bash
while getopts "pf:a:k:n:u:" opt; do
  case $opt in
  # netlify
  p) pip install --upgrade 'algoliasearch>=2.0,<3.0'
     # Environment variables below (except PWD) should be configured
     # in the section 'Build & deploy/Environment variables' of your site in Netlify;
     # Alternatively, the ALGOLIA_INDEX_NAME variable can be defined in the netlify.toml file.
     index_file="$PWD/$HUGO_INDEX_FILE"
     app_id="$ALGOLIA_APP_ID"
     admin_api_key="$ALGOLIA_ADMIN_API_KEY"
     index_name="$ALGOLIA_INDEX_NAME" ;;
  # local
  f) index_file="$OPTARG" ;;
  a) app_id="$OPTARG" ;;
  k) admin_api_key="$OPTARG" ;;
  n) index_name="$OPTARG" ;;
  u) base_url="$OPTARG" ;;
  \?) echo "Invalid option: -$OPTARG" >&2 ;;
  esac
done

python algolia/data-upload.py \
    -f "$index_file" \
    -a "$app_id" \
    -k "$admin_api_key" \
    -n "$index_name" \
    -u "$base_url"
To test in the local environment, run the script from the command line or via a Run/Debug configuration in IntelliJ IDEA. After the script execution, verify the Last build value in the application’s section Indices on Algolia.
Configuration Files
The Algolia params except for the algolia_indexName param in the config/_default/config.toml file should be populated with corresponding values. The algolia_apiKey param value here is the public API key that is only usable for search queries from the front end.
# Enable / Disable algolia search
  algolia_search    = true
  algolia_appId     = "NLO8K25GU4"
  algolia_apiKey    = "1ea1d7b821a9feb925c6bed046281341"
  # Set this option to false if you want to search within all articles in all languages at once
  algolia_currentLanguageOnly = true
The params.toml file in each config/<environment> directory contains only the algolia_indexName param set to the corresponding value, for example, like in config/dev/params.toml:
algolia_indexName = "dev_kiroule"
netlify.toml
The netlify.toml file contains the following configuration:
[build]
  publish = "public"
  command = "hugo"

# URL: https://kiroule.com/
[context.production.environment]
  HUGO_VERSION = "0.72.0"
  HUGO_ENV = "production"
  HUGO_ENABLEGITINFO = "true"
  # Algolia index name is needed to execute algolia/run-data-upload.sh
  ALGOLIA_INDEX_NAME = "prod_kiroule"

[context.production]
  command = "hugo --buildFuture && algolia/run-data-upload.sh -p"

# URL: https://dev--kiroule.netlify.app/
[context.dev.environment]
  HUGO_VERSION = "0.72.0"
  # Algolia index name is needed to execute algolia/run-data-upload.sh
  ALGOLIA_INDEX_NAME = "dev_kiroule"

[context.dev]
  command = "hugo --environment dev -b $DEPLOY_PRIME_URL --buildFuture --buildDrafts && algolia/run-data-upload.sh -p -u $DEPLOY_PRIME_URL"
The ALGOLIA_INDEX_NAME environment variable is defined per the deployment context. In the command setting in [context.dev] section, the algolia/run-data-upload.sh script should be executed with the -u $DEPLOY_PRIME_URL option to override the site’s production URL(https://www.kiroule.com/) with the site’s dev URL(https://dev--kiroule.netlify.app/) in the url field of index records.
Netlify Configuration
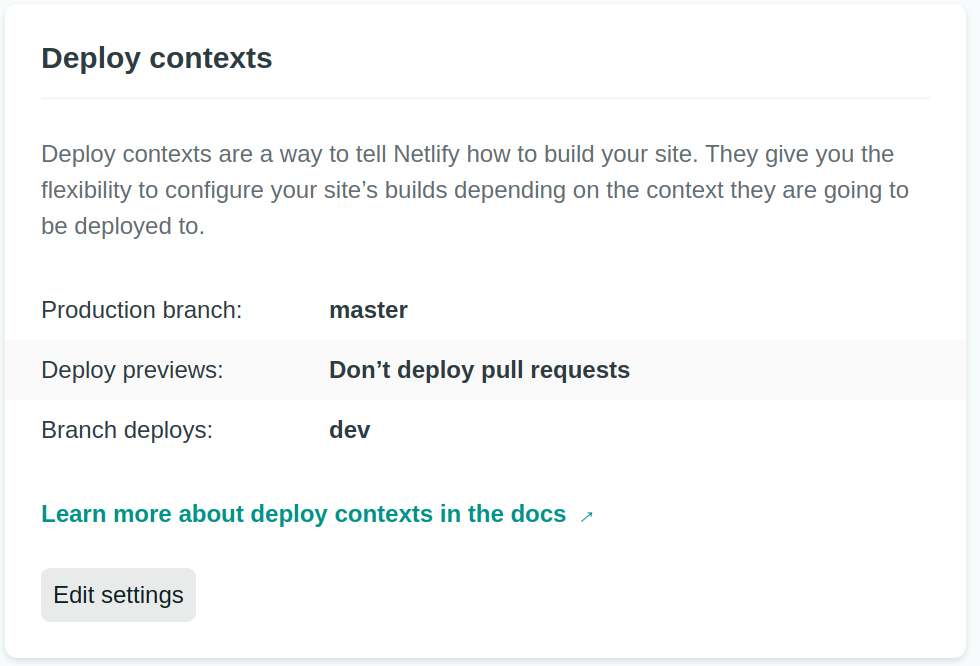
The deployment contexts should be defined accordingly in the section Deploy contexts of the Build & deploy site settings:
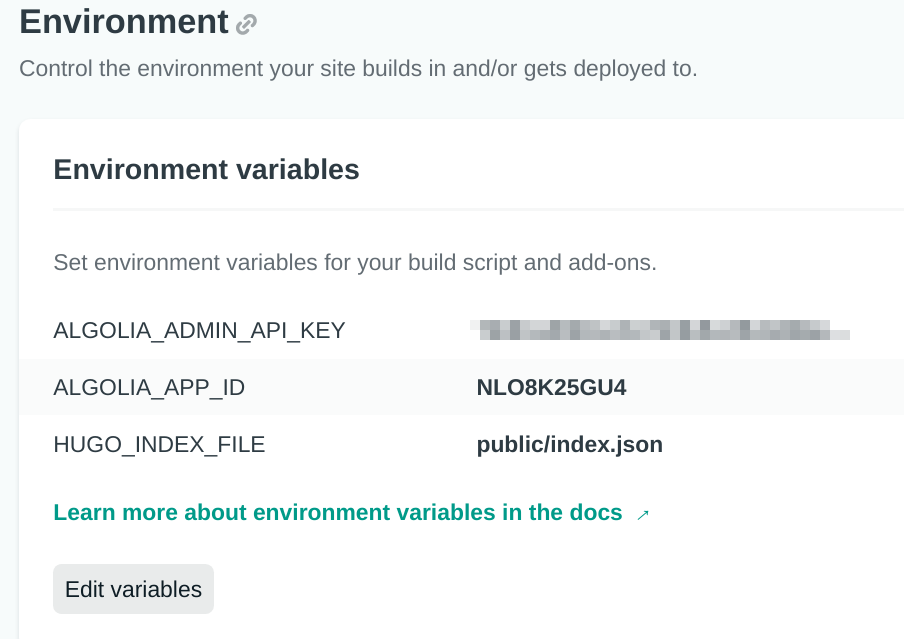
Environment variables that are common for all deployment contexts are defined at the site level in the section Environment variables. The ALGOLIA_ADMIN_API_KEY environment variable should be kept secret and is used to create, update, and delete indices.
Dev and Master Branch Deployments
Following the successful tests in the local environment, the changes in the local dev branch can be committed and pushed to the remote dev branch on GitHub. That will trigger build and deploy in the dev branch deployment context on Netlify. Successful indices upload to Algolia can be verified by checking the number of records contained in the ‘dev_kiroule’ index. The search feature should now be fully functional at dev–kiroule.netlify.app.
After merging the dev branch into the master branch on GitHub, the search feature should also work at kiroule.com:
Q.E.D.
Continue reading the series “Building Your Blog, the Geeky Way”:
- Start Blogging With Hugo, GitHub and Netlify
- Configure Custom Domain and HTTPS on Netlify
- Add Favicon to Hugo-Based Website
- Automate Data Upload to Algolia Index
- Manage Environment-Specific Settings for Hugo-Based Website
- Automate Data Upload to Algolia Index : Revisited
- Configure Custom Domain and HTTPS in Netlify : Revisited
- Use Aliases to Redirect Old URLs
- Automate Data Upload to Algolia Index with GitHub Actions